Welcome to The Tasteful Vegan

It is my hope to share wonderful, nutritious vegan recipes that anyone would love to eat! I am passionate about feeding my family healthy, tasty food and am committed to sharing my "best" with others. Non-vegan? You are welcome here too! Any of these recipes will enhance a more traditional diet. I believe some of the most intimate family moments can be had around the dinner table or in the kitchen so get in there and eat, cook, share, laugh and learn!


Search This Blog

Thursday, May 6, 2010

Spicy Couscous with Roasted Vegetables and Garbanzo Beans

Our friend Stacy invited us to dinner for a double birthday celebration. She is such a wonderful cook and we have shared many amazing meals with her family. I knew her dinner would be spectacular, but now that I am a vegan, I knew I couldn't partake in all of her delicious cooking.  Seriously, she has three kids and still managed to de-bone at least eight or more game hens that she individually stuffed.
Typically we always share in the cooking, so I was excited to bring a vegan side dish that the Engineer and I could also enjoy as our main meal. I also brought two appetizers just to ensure we would have enough to eat without making our host feel like she had to cater to our special diets. 

I wanted to bring something appealing to the eye with robust flavor that also tasted hearty.  I think Spicy Couscous with Roasted Vegetables and Garbanzo Beans fit the bill. I think my only change would be to add extra olive oil if not eating right away so that the beans and vegetables remain moist.

As with most of my recipes, chopping is really the hardest part of the deal. The couscous comes together in less than ten minutes. I mean from start to finish to the platter. Not sure what could be easier than that. I use the Near East brand of plain couscous and then spice it up before cooking. I think with any kind of vegetarian  cooking, the spices should be adundant so that your tastebuds are really alive. You will never miss the meat.

These two recipes are adapted from the book Easy Vegan, a wonderful little book full of amazing vegan dishes.


Spicy Couscous with Roasted Vegetables and Garbanzo Beans

1 box of Near East Brand plain Couscous
1 Tablespoon of olive oil
2 cups of vegetable broth
1 1/2 tsp of ground cumin
1 1/2 tsp of ground coriander
1 1/2 tsp of Spanish Sweet Paprika
1/4 tsp or more of cayenne pepper

Bring the oil, broth, and spices to a boil. Add entire box of couscous. Cover and turn off heat. Let sit for about 7 minutes. Fluff with a fork and let sit a few more minutes. Re-fluff to ensure no lumps. Pour onto a big platter.

Roasted Vegetables and Garbanzo Beans

1 pint of crimini mushrooms, left whole
1/2 pint of cherry tomatoes, halved
1 red bell pepper, roughly chopped
1 yellow bell pepper, roughly chopped
1 red onion, roughly chopped
1 fennel bulb, roughly chopped
1 dozen garlic cloves, peeled
1 large sweet potato, peeled and roughly chopped
salt and freshly ground pepper to taste
1/4 cup olive oil
1 1/2 cups drained garbanzo beans, I prefer fresh, but canned work fine
1/4 cup toasted pine nuts

Preheat oven to 350 degrees. Chop all vegetables and try to keep pieces around the same size. Not too small but not overly big. Put all veggies in a big bowl and sprinkle with oil. Toss to make sure all items are covered. Spread veggies onto two foil lined cookie sheets and sprinkle generously with salt and pepper. Bake for about one hour. Start checking at 35 minutes to ensure even browning and that nothing is burning. You may have to give them a little toss. Remove from the oven and add beans that have tossed in a touch of olive oil. Put back in the oven and roast another 20-30 minutes. Remove from the oven and spread over the couscous. Top with toasted pine nuts.  Romesco sauce would make a nice accompaniment. See blog for that recipe.

As an appetizer, I brought Romesco Sauce served with warm pita wedges and kalamata olives. The other appetizer was fresh guacamole served with a tangy pico de gallo. That recipe will be featured soon.


I like to do all my chopping at once. Spreading things on a large tray helps keep you organzied. Plus, clean-up is a breeze.


Toss the vegetables in olive oil to lightly coat each piece.


Make sure to spead vegetables out evenly on the tray. Over crowding will lead to steamed versus roasted vegetables. They will shrink down and for the final roasting phase, they can be combined to one sheet pan. Also, make sure to line each pan with foil. Makes clean-up much easier plus the vegetables won't stick to the pan.


Here the vegetables have been combined to one pan along with garbanzo beans. Toss the garbanzo beans in a little bit of olive oil before adding to the vegetables so they don't dry out.


This is a photo of the vegetables and garbanzo beans after the final roasting phase.


To serve, spoon the veggies over the Spiced Couscous and sprinkle with toasted pine nuts.

Do any of you have any tried and true recipes that you like to bring when invited over for dinner? Please share. I know there are many great cooks out there!

Tuesday, May 4, 2010

Soupy Rice in Rich Tomato Broth

Our littlest guy was sick most of the night with a stomach virus. By noon he was so hungry, but nothing sounded good....until Mama made Soupy Rice in Rich Tomato Broth.  This dish is perfect on a cold day, when under the weather, as a snack, for breakfast, or in the lunchbox thermos. It takes minutes to prepare and tastes delicious.

Soupy Rice in Rich Tomato Broth

1/2 onion, chopped fine
3/4 cup finely chopped carrot
1 cup white rice
2 T olive oil
1 can organic tomato sauce
1 clove of garlic
1 1/2 tsp cumin
1 1/2 tsp sweet paprika
3 + cups water - start with three and as rice cooks, add more water as needed to keep it soupy
1 T Better Than Broth Vegetable Base low sodium version
salt to taste

Saute onion, carrot and garlic in oil until onion is translucent and carrot is soft. Add rice and saute a minute or two until rice is coated in oil. Add tomato sauce, water, veggie base, cumin and paprika. Taste and add salt if needed. Bring to a very slow simmer and cook until rice is tender. You may have to add up to two or more cups of water as the rice thickens the broth.

Serve with warm flour tortillas. If you are not sick, feel free to add cilantro and sliced avocado. Keep it simple if recovering.

Our little guy kept hovering around the kitchen anxious to try a bowl. After cooling the first bite and eating he said,"Yum Mama, this is perfect." I am so happy when I can provide just what they need to feel better.


Ok, so not the best photograph. However, this dish is meant to be simple but oh so delicious.

Saturday, May 1, 2010

Green Beans with Shitake Mushrooms

Green beans with shitake mushrooms make a quick, tasty side dish.  As we approach summer, farmers markets pop up every week selling numerous varieties of beans. Take advantage of these markets and try some heirloom varieties. They are loaded with nutrients plus make for a pretty presentation. Food presentation is a huge deal to me which is why I add photographs for each recipe. A nice plate makes your mouth water before you have even taken that first bite.

Shitake mushrooms have been used medically in the East for ages. Wikipedia notes that shitake mushrooms  stimulate the immune system, contain a cholesterol lowering compound called eritadenine and possess antibacterial and anti-viral properties among others. I try to incorporate shitakes into my diet at least 2 times per week and especially if I am under the weather. They taste delicious and are easily incorporated into soups, veggies, pasta sauces and salads.

One of our kids always preps the beans by cutting the stems of either end. It is a great way to get those kids involved in the kitchen plus it helps them learn important knife skills. The more kids cook and prep, the more kids eat. That has been a fact in our house. The more involved the kids are in the kitchen, the more you as a parent can teach about healthy eating and good habits.  I want the boys to know just as much about cooking as our daughter. And guess what? Cleaning comes with the territory. Little boys love to be up to their elbows in bubbles loading a dishwasher. They will have a blast all the while learning the aspects of what it takes to put a meal on the table and clean it up.  Sorting silverware is another great task for kids. I try to piggyback any chopping or fun cooking job with a small cleaning job. That way they understand that the two go together.

Green Beans with Shitake Mushrooms

green beans, any variety and quantity, ends trimmed
olive oil
salt and pepper to taste
shitake mushrooms, stems removed and sliced, do not rinse!

Saute mushrooms in a small amount of olive oil depending on quantity of mushrooms.  Add salt and pepper to taste. Put a pot of water on high heat. When it comes to a rolling boil add generous amount of salt and toss in beans. Cook just until crisp tender. Drain and add beans to mushrooms. Add a bit of olive oil, salt, pepper and toss to coat.  Slivered almonds would make a nice addition.


I think food looks so pretty served on a crisp white platter.


This beautiful plate was part of my lunch one day. I grabbed a handful of green beans and quickly cooked the mushrooms. It came together in minutes. Don't feel the pressure to cook large quantities. At the same time, don't choose to not cook because you are only cooking for yourself.


Thursday, April 29, 2010

Lavosh Vegetable Roll-Ups

I am so excited to share this recipe with you all! Most importantly because it is from the Engineer, my husband. (I am trying to keep names off of my blog :)) He has had a variation of this amazing lunch for the past three days and I guess his culinary inspiration motivated him to take beautiful photos to boot.  So it is with great pleasure that I introduce you to the Lavosh Vegetable Roll-up.

Lavosh is a thin, pliable flatbread that lends itself to many different ingredients. It comes in a regular and whole wheat variety, either of which taste delicious.  It is fat free, cholesterol free, sugar free and low in carbohydrates. It does contain a small amount of protein too but it is important to include either hummus, beans or a grain to up the protein content and keep you healthy and strong.

I am grateful to have a family so fully supportive of eating healthy! While the Engineer is not a vegan, he does eat vegan/vegetarian on most days and for most meals. I am so happy to have a partner that takes health seriously and supports trying new things. With that said, I would never force a vegan diet on anyone. It is by example that I prefer to work some magic. And let me tell you it is rubbing off all over the place! Yay healthy bodies and minds!!!

Lavosh Vegetable Roll-ups

1 piece of lavosh flatbread
3 T hummus
1/2 cup chopped romaine lettuce
10 sliced cherry tomatoes
10 sliced kalamata olives
1 T of salad dressing of choice such as italian or balsamic

Additions based on availability:

whole garbanzo beans
diced red onion
sliced cucumber
sliced radish
sun-dried tomatoes
avocado
jicama sticks
(and shredded cheese for those non-vegans!)

Spread lavosh with hummus. Line ingredients up and roll. Slice in half. If you are super hungry, eat the whole thing. If not, eat half for lunch and half for your late afternoon snack.


Look at this fresh and vibrant wrap. It is loaded with healthy ingredients to keep your body moving and your brain on task.


Let's eat! Wrap these yuumies up and pack in the lunch box.

I am thinking of a Mexican version as well. Black beans pureed, cilantro, lettuce, olives, tomatoes, red onion, garlic and corn. Served with a side of tortilla chips and salsa. Photos to come soon!

Question of the day:
How is your healthy eating affecting family members and friends?

Tuesday, April 27, 2010

Pasta Pesto

Who doesn't love a warm bowl of pesto pasta? It is kid friendly, nutritious and oh so yummy!  This quick and easy version is a snap to throw together. The whole sauce can be made and the dishes cleaned before your pasta has finished cooking.   In addition, the pesto can be made ahead and stored in the refrigerator covered in a thin layer of oil. The left overs are delicious cold or at room temperature making it a great lunchbox meal.  I have adapted my version of Pesto Pasta from a recipe called Yummy Vegan Pesto Classico from the Allrecipes website. 

Pasta Pesto
1/2 cup toasted pine nuts
2/3 cup olive oil
1-2 bunches fresh basil, washed and leaves removed from stems
5-10 cloves of fresh garlic depending on your preference
1/3 cup nutritional yeast
1 tsp salt, more to taste if needed
freshly ground pepper
pasta, either thin spagetti, tubular, bowtie etc. I used barilla high protein pasta for this version although whole wheat is nice too.

Toast pine nuts in a dry, small pan over low heat. Stir freqently and do not walk away from stove. As soon as they start to turn golden and release flavor, take off of heat. Add to a food processor.  Add rest of ingredient except oil and pulse a few times. As processor is running, drizzle oil into the mixture and process until smooth. Taste and adjust, salt, pepper and garlic.

I usually make a full batch of pasta and use almost the entire batch of pesto to coat warm pasta. Serve with mixed green salad and Green Beans with Shitake Mushrooms. Recipe to follow.

Another great thing about this recipe is that even non-vegans will love it! They won't be able to tell that it does not have any parmesan cheese. It is that delicious! As a reminder, nutritional yeast can be purchased in the bulk aisle of any health food type market. It is good, good stuff loaded in b vitamins and oh so very tasty!


Warm pasta pesto made with thin, extra protein Barilla spagetti.


The final meal for the family.  Pasta pesto, green beans with shitake mushrooms and mixed green salad.  Healthy, delicious, and makes great left overs. The kids and hubby gobbled it up plus had it for lunch  the next day.


Version two of pasta pesto made with penne pasta. It was really, really delicious!

I know we have heard it before, but it bears repeating. Get the kids in the kitchen asap! Are they picky eaters? Have them pick off the leaves of the basil. The fragrance as they pick is overwhelming. Casually comment about how wonderful it smells. My eight year old cut the ends off of all those green beans. He sat at the kitchen counter and worked on his knife skills. We talked and snacked on raw green beans. Guess how many he ate at dinner? Tons! So what if he picked out the mushrooms. Next time he may try one. Don't make a big deal about food. And it may take twenty times for it to be on the table before they try it. Don't despair! My five year old just asked me to buy cherry tomatoes for his lunchbox. It took five years but he finally tried one and love it!   I never choose to not make an item because my kids won't eat it. Never, never ever! How else will they learn to like it if it isn't offered regularly? They won't wake up one day and beg for roasted broccoli UNTIL they try it and fall in love. So keep offering those healthy foods.

Enjoy and be healthy!


Thursday, April 22, 2010

Baby Bok Choy Simmered in Broth

Baby bok choy, a younger version of Bok Choy, is a mild tasting delicious vegetable. Baby bok choy is a wonderful source of calcium and loaded with vitamins A and C and is a rich source of potassium.

What I love most about cooking with Baby bok choy is that it isn't your everyday veggie like broccoli or green beans. Many associate bok choy with Aisian cuisine, however this tasty veggie can be prepared in many ways.

I love the idea of simmering the bok choy in a rich, garlicky broth. I am drawn to sauce of any kind so this recipe really appeals to my tastebuds.  It pairs nicely with brown rice and I have been known to eat leftovers for a mid-morning snack.

Baby Bok Choy Simmered in Broth

baby bok choy- as many as you like
freshly minced garlic, between 3-5 cloves
enough veggie broth to simmer bok choy. I like Better Than Bouillon reduced sodium vegetable base
cooking spray and olive oil
salt and freshly ground pepper to taste

Pull off any outer browned leaves. Slice baby bok choy in half lengthwise. Put in a big bowl of clean water to wash out the dirt and grime. Coat a large pan with cooking spray and drizzle with a few teaspoons of olive oil. As pan is warmed, add bok choy cut side down and sprinkle with salt and pepper. Cook for a few minutes on low to medium heat just until starting to brown. Add broth and garlic. Simmer until stalks are tender. Serve baby bok choy and broth over brown rice. Enjoy!


Slice baby bok choy in half lengthwise.


Put baby bok choy in a large bowl of clean water and swish!


Add baby bok choy to heated pan, cut side down.


Add garlic and broth to cover about 1/2 way of bok choy, you don't want them submerged. As they cook, the broth will reduce. Taste broth before adding final salt. You may not need it.

Tuesday, April 20, 2010

Genocide in the Darfur Region of the Sudan

Gabe Ferrick, a 15 year old Santa Rosa, CA, youth, has raised close to $40,000.00 for the efforts to end genocide in Darfur. On April 18, 2010, our family joined Gabe and people from all faiths and ethnicities to raise awareness for this noble cause. Co-sponsored by Gabe and Congregation Shomrei Torah, the walk took place on a crsip, beautiful Sunday morning. The energy from the crowd was palpable. People were singing, talking, hoping and praying that one day there will be peace in Darfur.

(Gabe)

Supervisor Shirlee Zane spoke along with Holocaust survivor, Lillian Judd, age 86. Lillian shared her story with the group and I am sure there wasn't a dry eye in the area. Lillain witnessed her father's murder by the gestapo. Her mother and two sisters were sent to the gas chambers. Lillian and her other sister were sent to hard labor. She felt that if more people would have spoken up, such crimes would not have been allowed to happen. She praised the groups efforts for taking a stand and raising awareness. How else will we stop genocide?

(Lillian sharing her message.)

(Our three kids with Lillian plus a good friend)

Our daughter, age 11, wrote a poem about the genocide in Darfur. The poetry contest, sponsored by the walk, was judged by a group of teachers associated with the event. Our daughter won first place and was asked, along with the runner-up, to recite her poem before the race began. Her dad and I were overcome with emotion watching her speak, at such a young age, with so much passion and clarity. Below is her poem...


A World of Peace
by our daughter, age 11

I envision a world of peace,
It's more difficult than you think,
Since the world never is at ease,
help us now, make a link,
Say goodbye to the Janjaweed,
Help us now, won't you please?

We dance and frolic about our life,
never wonder, what it's like,
To live in a world with no education or life,
Pushed around, day and night,
Hoping for a new light,
Say goodbye to the Janjaweed,
Help us now, won't you please?
(Our daugher reciting her poem!)


The Janjaweed is the term used for the armed gunmen responsible for the massacre, rape, murder and forced displacement of those in the Darfur region of the Sudan. The Sudanese government has been charged with ethnic cleansing and crimes against humanity.

The Darfur genocide is in its 7th year. Over 400,000 people have be ruthlessly murdered. That is like losing the entire town of Santa Rosa, CA!  Please consider what each of you can do to raise awareness and end the suffering of these people. We can make a difference!
Our daughter with Gabe.

Our daugher and Gabe getting their photo taken for the school.

Our family right before the walk!


Our group walking! It was amazing!

Our youngest being carried by Dad.
Our kids with Gabe after a 3 mile walk.
Our daughter with two close friends. The middle friend won second place and wrote an equally moving piece of poetry for the contest.

Donations will be accepted at www.walktoendgenocide.org through the end of April.

Saturday, April 17, 2010

Open Faced Vegetable Sandwich and Romesco Sauce

Bursting with flavor, this open faced vegetable sandwich is a perfect Saturday afternoon lunch. It leaves you satisfied, but not overly full, so you will have plenty of energy to tackle the garden, gym or whatever suits your fancy!

Open Faced Vegetable Sandwich

2 pieces whole grain bread per person
1 large portobello mushroom per two people
container of fresh oil packed sundried tomatoes (we have them located in the olive bar at our Whole Foods)
container of fresh kalamata olives
baby spinach
hummus
romesco sauce
lemon pepper to taste
salt to taste

Toast the bread. With a spoon, scrape out underbelly of mushroom. Slice mushroom and spray with olive oil cooking spray. Sprinkle with lemon pepper and salt. Cook on grill pan until tender and just at the point of giving up its juices. When toast is ready, take one piece and spread a thin layer of romesco sauce. Add layer of spinach, and generously heap with cooked mushroom. Take the other piece of toast and spread with hummus.  Add layer of spinach and two or three tomatoes. Serve olives on the side.

I prefer to savor each piece alone, but feel free to combine the two into one decadent sandwich. This sandwich can be adapted so easily! Add grilled zuchini, eggplant, or roasted red peppers for variety. Artichoke, lemon zest and green beans would also be lovely. The possibilities are endless!


Romesco Sauce is a Spanish spread that is amazing with roasted root vegetables and/or spread on sandwiches or toast.  It keeps in the refrigerator for about a month if covered in a layer of extra virgin olive oil. I have never purchased it pre-made but I would bet you could find it at a specialty market. I have to urge you to give ths recipe a whirl. It isn't nearly as time consuming as it initially seems. It is most impressive to serve as an appetizer with an array of roasted or grilled vegetables and offers variety from the same old dips and spreads.

This recipe is adapted from the book Simple Soirees by Peggy Knickerbocker. There are many varieties of Romesco on the internet, but I have adapted this one to be quick and easy. I had the pleasure of meeting Peggy at a cooking class that my dear friend Sherri took me to for her birthday last year. It was a wonderful evening of cooking together and something I highly recommend you do with your buddies. If you are new to cooking or looking to liven the repertoire in your own kitchen, cooking classes provide ample lessons and loads of fun!


Ingredients for Romesco Sauce. Always get your ingredients out before you begin cooking. Put them away as you use them to help keep a clean and organized kitchen.


Romesco Sauce
adapted from the book Simple Soirees by Peggy Knickerbocker

3 teaspoons chili powder
1 1/2 cups hazelnuts, roasted
6 cloves minced garlic
jar of roasted red peppers, I use between 3 and whole jar, depending on taste and size
3 T of tomato paste, add more if needed
1 1/2 tablespoons sweet paprika
1/2 teaspoon hot paprika
2 1/2 tablespoons sherry vinegar
1 1/2 cups olive oil
salt to taste, start with 1/4 teaspoon and adjust as needed

Take foil lined pan and add nuts. Roast in the oven at 400 degrees until just starting to turn lightly brown and fragrant. Watch closely as they go from done to burned quickly.  Add nuts to food processor along with rest of ingredients except olive oil. Start pulsing. Slowly drizzle the olive oil through the spout. You want a consistency slighty softer than peanut butter. Have a piece of bread on hand for tasting. Adjust salt and oil if needed. This sauce tastes better after a day or so. The flavors blend and soften. However that doesn't mean that we don't dig in right away. This makes a large batch. Save in a pyrex covered with oil. It will harden in the refrigerator but mix the olive oil back in or spread on warm toast to soften again. This is such a versatile recipe to have on hand. Yum! Yum! Yum!

Tuesday, April 13, 2010

Tisea

Oh how I LOVE this dish. Tisea is a Middle Eastern breakfast dish that gives you a warm and satisfied feeling after eating. Breakfast can be tricky for Vegans. Without all those egg and bacon dishes, what is a person to do for weekend comfort food? Well, here is your answer folks. Tisea. It may seem odd to eat garbanzo beans in the morning, but I can assure you, after you eating this dish, you will be tanked up until early afternoon feeling oh so good!

I have to thank my in-laws for introducing my palate to these new foods. I had never had such things growing up. The most exotic thing we had was Mexican food, typically from home.  I'll never forget when my in-laws first came to stay with us. I was not one to try new things, but there was no way that I could hurt their feelings and decline. Before you know it, I was gobbling up this and that and going back for more.

My father-in-law is the Tisea maker of the house. He used to make a lovely version with yogurt and hot butter that we enjoyed for many years. I lamented to my sweet father-in-law on his recent visit how much I would miss enjoying his Tisea when he said,"Oh there is another version!"  I was so excited! The next morning we all enjoyed a beautiful spread of food together and indeed we were truly comforted.

Tisea

1 bag garbanzo beans
2 tsp baking soda
1 bag of pita bread
1 bunch parsley
1-2 cloves of fresh garlic
1/3 olive oil
1-2 T ground cumin

Place beans in a bowl. Add baking soda and water to beans. Stir. Let sit overnight. Next morning, pour beans AND the baking soda water into a pot. Boil until tender (this doesn't take too long). Maybe 20-30 minutes.  Remove from heat but don't drain. You need the cooking water. Toast the pita bread until a bit toasted. Tear into large pieces and put in a large casserole dish. With a slotted spoon, scoop out about half of the beans ( or more if you have a big dish) and place over the pita bread in the casserole dish.  Add one cup to one and a half cups of  beans to blender, add 1/3 cup oil, garlic, salt and 1-2 cups cooking water to blend into a watery mixture. Add the water slowly because you can always add more. If you get too much water, just add some more beans, garlic, salt etc. It shouldn't be thick like hummus but watery. Pour this over the beans and pita. It should have a milky look to it. Then add about 1 cup of parsley leaves (or more) and generously sprinkle with ground cumin. The pita gets nice and soft and the bean are tender and warm. Scoop a generous serving into a bowl. YUM!

Serve with kalamata olives, toasted pita triangles and hummus.

*Note: In the photos, we served it with a homemade olive oil hummus and a homemade romesco sauce. I will be including recipes for both at a future date. And although romesco sauce isn't Middle Eastern, it went beautifully with what we ate.

Do you see how it looks milky? But the beans are still showing through. You don't want to drown the entire thing. I like a little more parsley than shown.


In this picture we have the olive oil hummus, the olives and romesco sauce. My husband is adding the final drizzle of olive oil to the romesco.


The feast assembled. We are only missing the toasted pita to scoop up all that good stuff.

Sunday, April 11, 2010

Grilled Asparagus and Take-out Pizza

Spring is here and that means an abundance of fresh vegetables for your table!

One of our favorites is asparagus. The beautiful, crisp, green stems are just begging to be used in everything from salads to stir fries.

Grilling is a wonderful way to keep those gems crisp while imparting a delicious smoky flavor. Prepping asparagus doesn't take more than a few minutes making it an ideal accompaniment to most any main dish.

Chop off the woody stems and then use a veggie peeler to thin out the remaining base. This ensures an incredibly tender stalk.

After a quick rinse in cold water, gently pat dry and place on a large platter. Drizzle with extra virgin olive oil and sprinkle with Himalyan Pink Sea Salt (any sea salt will do) and a few twists of the pepper mill.

Make sure the grill is hot. Add the asparagus and close the grill for a few minutes. Don't wander off as these can burn quickly. After the asparagus begins to show grill marks, remove from grill to a clean platter. Drizzle with an aged balsamic vinegar and serve.

The nutritional benefits of eating asparagus are numerous. Touted to reduce cholesterol and blood pressure to name a few, it is also full of vitamins. Make sure to grill a few extras for lunch the next day. They are delicious cold and can be enjoyed as is or chopped into a salad.

We all have to take a break from the kitchen from time to time. One of our favorite take-outs is pizza. I think this has been the hardest habit to tweak since becoming vegan.  Eating out can easily fit into a healthy lifestyle if you are willing to make a few changes. I try to keep a list of  local favorite places and the items I know I can eat without worry. This preparation can prevent the defeatest attitude of eating like I used to because I didn't plan. So, back to pizza. Any pizza place is usually willing to customize a mini pizza to your liking and make it without cheese. I have found the mushroom with tons of chopped garlic is my particular favorite. Served with my grilled asparagus, I am completely satisfied and I don't feel like I have thrown my healthly lifestyle out the window.  Our kids aren't vegan but they do tend to order veggie pizza more than pepperoni. By adding the grilled asparagus they are getting those extra nutrients and antioxidents which their little bodies need. Maybe one day they will ask to try my pizza, and I will know that the example I am trying to set has made an impact. 


Don't these look amazing?


They taste just as good as they look. I usually grill two batches of these goodies because even the kids are attacking the plate.


This would make great lunchbox food for the next day. Pack a slice or two and some asparagus for the next day. Include a cloth napkin and a thermos of hot tea and maybe a tangerine or apple. Watch your co-workers or fellow students drool over such a comforting lunch and noticed how energized you feel after taking such good care of yourself. Bon apetit!

Friday, April 9, 2010

Middle Eastern Spinach Triangles

It is amazing how so many of our memories are associated with food. When I think of my Grandmothers, I can't help think about the good cooking we had from both of their kitchens. I see them in the kitchen, cutting, chopping, stirring, tasting, offering, laughing, sweating, and teaching. We don't think these times will end, but all good things eventually do.

That is why it is so important to have the kids in the kitchen with you. It is why I really believe that the kitchen is the heart of the home. When you are in the kitchen with family, you are present, focused on the task at hand, and the conversation flows freely. You are collectively working on a family meal, anticipating its taste and aromas.

If the kitchen isn't the heart of your home, it is time to ask why. Does it need a good scrub? Do you need to re-organize things to rid the space of extraneous clutter? Are you swamped with plastic cups, coffee mugs, teacups and plasticware? If so, make today the day you work towards making this an inviting place for your family to meet and get together. No one wants to cook, eat or share in a dirty kitchen. Put some flowers on table, have the votives (and matches!) handy so that when it is time to cook dinner or set the table you are ready. Clear out a special spot for some teas near where you keep your cups. In our house, we can't get down to business without a hot cup of tea, usually herbal or green.  Have a nice variety available for guests and yourselves for that matter. Do you see how quickly things can evolve to set the stage for magic? You are creating a place of respite from everything else out in the world plus teaching your kids to do so just by example.

This week, we have spent many, many hours in the kitchen. All of them have been meaningful. My in-laws arrived last Saturday and both are spectacular cooks! They live out of the country and each time they come, we ask for the same dishes over and over. It reminds my husband of his childhood, it reminds me of my in-laws and it teaches our children their heritage.  Luckily, where they are from, meat, chicken and fish are not usually the showcase of the dish so they were more than willing to cook without these items. Not once did we miss them in the cooking and more often than not, the recipe itself was already vegan.

One of the most delicious labors of love are the Spinach Triangles my mother-in-law makes.  This is a family affair for sure. When we make them, it isn't a dozen, it is several dozen. That's because you eat half right as they come from the oven! I am going to cut the recipe way, way down especially since most of us will be making them for smaller families and I'm sure you don't have an extended family army waiting to stuff and roll. Plus it is much better to learn something new by cooking it in a small batch. To make a larger batch, just double or triple the ingredients. They freeze beautifully after cooking and so does any leftover spinach filling. They are a perfect appetizer or lunch box accompaniment to tomato soup. Or, you can eat them like my daughter by just grabbing one from the plate each and every time you walk by the kitchen...which is often!

There are many versions of this recipe as they are a staple in most Middle Eastern households.  This recipe is straight from my in-laws and it is how they have made them since really forever. I only deviate to make the recipe smaller but the taste should be close to the same.


Middle Eastern Spinach Triangles
adapted from my mother-in-law

Dough
1 package active dry yeast
3/4 cup warm water
2 plus cups of flour
2 teaspoons salt
1/8 cup of olive oil


Add yeast to warm water and let sit for five minutes. Get large mixing bowl and add flour and salt. Pour warm yeast and oil onto flour and begin to combine. Add more flour as needed to form an elastic dough. If you need guidance on making dough, there are many references on the internet. Cover dough and set in a warm area to rise until doubled.

Spinach Mixture:
1 bag of frozen organic spinach (if boxed kind, you may need two small boxes)
1 medium onion, chopped
1/4 cup olive oil
1 bunch cilantro, cleaned and leaves removed from stems
about 5 garlic cloves, minced (could need more depending on taste)
5-7 fresh lemons, juiced
salt to taste
about 2-3 teaspoons red pepper flakes
about 1 1/2 teaspoons ground allspice
seeds of half a pomegranate (when in season, buy and freeze for when you need-but can be made without)
1 cup walnuts, crushed to a fine texture (put in plastic ziploc and hit with a pan to crush)

Thaw spinach over colander. Squeeze excess water. Set aside. Put oil in dutch oven and heat. Add onion and cook until translucent. Take off heat. Add spices and salt. Chop cilantro leaves and mash in the minced garlic to release flavor of cilantro and garlic. Add to onion. Add squeezed spinach, walnuts, pomegranate seeds if using. Add lemon juice a little bit at a time to desired tartness. Mix it all together adjusting seasonings, lemon and oil. This is a very "to taste" type recipe so it is whatever you like. You also don't need to cook the spinach as it will be baked in the dough.
Once dough has risen, roll out a little bit and add some olive oil. Fold and roll this into the dough. Do this two more times adding flour as needed. Finally roll dough to a thin layer. Use a large biscuit cutter to cut circles. Place a generous scoop of spinach in the middle and pinch up the sides to form a triangle ( picture below). You can also make large ones for lunch and fold over like a calzone. Or, you may make open faced ones (picture below). After folding, place on an oiled, foil covered baking sheet. Make sure to roll the triangle around to cover in the olive oil. Bake at 400 degrees until lightly golden brown.  Hopefully you get the picture that you can personalize these to your liking in both shape and taste. Warning! These are addictive!

Today is a sad day in our house. My in-laws have left and with that our daily cooking sessions. I still get a whiff of their cologne and perfume as I walk by their bedroom. As I bite into a spinach triangle and cradle a hot cup of mint tea, I am reminded of the fun times we have had over the past week, and I smile.
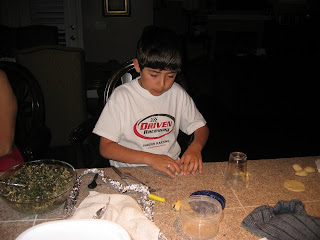
Teta with the grandkids making the dough.


A lesson from the master. My daughter learning how to roll the dough.


Teta still rolling dough. I told you it was a long process when you make so many!

Jiddo, Teta and grandson all making dough in the kitchen.


Other grandson learning to roll dough. He finally took off his hat!

Yummy! Open-faced spinach treats.

Spinach mixture on the stove.

Hot from the oven spinach triangles. Why on such a measly sheet you ask? Both ovens went out! We would not be deterred and ended up baking these in my toaster oven! They still turned out wonderful.

We did find time for a little outside fun. Here is the family at the show "Wicked" in San Francisco.
It was spectacular!

Monday, April 5, 2010

Mexican Red Quinoa Salad

Loaded with flavor, crunch, tang, zip and zest, this Mexican salad is bursting with yummy goodness. Give yourself plenty of time to do the prep for this one.  I can assure you, it is well worth the effort.

My dear sister-in-law, Esther, has been a vegetarian ever since I have known her. She is a great cook and shared a Mediterranean Quinoa Salad that my husband and I ate into the ground (yes, I will be sharing my version of this salad later). It is incredibly tasty and healthy, but I decided to try my hand at a Mexican version, to give our tastebuds a bit of a break from such a tried and true dish.

The Mexican version has evolved several times since I first made it. Each time, we think of a new ingredient to include, and it always turns out just a bit better than the last time we ate it. This is the type of salad that one plate turns to two, then before you know it, you are on your third plate and forcing yourself to walk away from the table.

This recipe makes a huge batch.   It holds in the refrigerator for several days making it ideal lunchbox food.  It can be beautifully presented on a large white platter and makes an impressive buffet addition. You can easily make this salad for four or twenty by increasing all of the ingredients. Listening to the oohs and ahhs around the table will make you feel like a culinary genius!

Mexican Red Quinoa Salad

1 cup red quinoa
2 cups water
1 bunch watercress, rinsed and all the leaves pulled from the stem
2-3 cups cabbage, shredded (buy the pre-shredded bag)
2-3 cups carrots, shredded (buy the pre-shredded bag)
1 bunch cilantro, washed and all the leaves pulled from the stem
1 small bag frozen, organic, sweet white corn
1/2-1 diced red pepper
1/2 diced jicama
1 pint cherry tomatoes, halved
1/2-1 red onion, diced
3-5 green onions, diced, both white and green parts
1 cucumber, diced, leave skin on for extra nutrients, either Traditional or English work fine
1 bunch radishes, sliced and quartered
1 bag cooked, black beluga lentils from Trader Joes OR 1 can drained and rinsed black beans
2-4 limes, lemons or combo, juiced
1/2-3/4 cup olive oil
5 cloves garlic, minced
salt and pepper to taste
avocado slices for garnish
tortilla chips for garnish

Additions per your taste: For those that like a punch, dice a seeded jalapeno pepper or add one teaspoon of cayenne pepper to the dressing.

Cook quinoa in water until done.  Add all the ingredients to a big bowl.  Mix olive oil, lime, cumin and minced garlic. Pour over salad and toss well. Taste and adjust lime juice, olive oil, salt and pepper.  Garnish with slices of avocado and/or high quality tortilla chips.

Note: Where recipe calls for 1/2-1 of some ingredient, feel free to judge based on the size of the produce on hand, how much to use. If I get a huge red bell pepper, 1/2 may be enough.  If it is small, I may use the whole thing.  Accordingly, if I am making the salad for a buffet, I will add two whole red bell peppers and increase the rest of the ingredients as well.  It is a pretty full proof recipe.

For a nice luncheon, make a big pitcher of iced, mint tea with lemon slices and serve with homemade vegan chocolate chip cookies (recipe for these amazing cookies will appear soon.) Bon Apetit!

A note about quinoa as stated on the Pearl Quinoa Alter Eco Fair Trade bag," Alter Eco Quinoa is an ancient grain that has been cultivated in the Andes Mountains of South America for more than 5,000 years.  Locally referred to as the "mother grain" and as a "protein powerhouse," it kept the Incan armies strong and robust."


I am embarassed to say that only three of us sat down to lunch and ate almost the ENTIRE salad in one sitting! YUMMY!

Wednesday, March 31, 2010

Popcorn with Nutritional Yeast

Popcorn, a whole-grain snack, full of dietary fibre, protein, iron, calcium and B vitamins, is a great go-to snack just about any time. And popcorn tastes great. It satisfies that crunchy/salty snack we sometimes crave and it is relatively low in calories.

I am not talking about microwave popcorn either. Who wants that stale, chemical laden treat in their bodies when they can have real, home popped popcorn in the same amount of time? Not me!

One of our favorite family items is our Cuisinart EasyPop Popcorn Maker. We use this popcorn maker almost daily! It is that good. Ours, purchased from Williams-Sonoma, was about $50.00, and so worth the money considering how much we love this tasty treat. Used with an organic popping corn, you just can't make a healthier snack.

To keep this treat healthy, I lightly spray the corn  with cooking spray prior to popping. The top vent allows steam to escape so you end up with a truly crisp kernal. Next, I sprinkle about 2 teaspoons of nutritional yeast, found in the bulk aisle of any health food store, over the popped corn and give it a few sprays of Olive Oil cooking spray. You could also melt a tiny bit of Earth Balance Buttery Spread if you have the calories to burn. Maybe a small dash of salt to complete. The nutritional yeast is what makes this popcorn over-the-top addictive! It imparts a slightly cheesy taste that is irresistable while still adding nutritional benefit. What more could a person ask for in a snack?

This is a staple after school snack for the kids. I make a big batch and divy it up into individual portions. As I pick up carpool, I hand each kid a bag as they get in the car. I also love to bring this into the movies, smuggled into my big purse with bottled water. I have zero guilt or worry while enjoying the healthy version of artery clogging movie theatre popcorn. For a special treat you could add a few vegan chocolate chips, raisins or nuts. There are so many endless possibilites. The key is taking the five minutes to make yourself or those you love a healthy snack and being PREPARED before hunger strikes! I had to put that in bold. Not just for you to read, but for me too. Being prepared with healthy food make it so much easier to resist what is bad. And, it only takes minutes. Bon Apetit!