Welcome to The Tasteful Vegan

It is my hope to share wonderful, nutritious vegan recipes that anyone would love to eat! I am passionate about feeding my family healthy, tasty food and am committed to sharing my "best" with others. Non-vegan? You are welcome here too! Any of these recipes will enhance a more traditional diet. I believe some of the most intimate family moments can be had around the dinner table or in the kitchen so get in there and eat, cook, share, laugh and learn!


Search This Blog

Saturday, April 17, 2010

Open Faced Vegetable Sandwich and Romesco Sauce

Bursting with flavor, this open faced vegetable sandwich is a perfect Saturday afternoon lunch. It leaves you satisfied, but not overly full, so you will have plenty of energy to tackle the garden, gym or whatever suits your fancy!

Open Faced Vegetable Sandwich

2 pieces whole grain bread per person
1 large portobello mushroom per two people
container of fresh oil packed sundried tomatoes (we have them located in the olive bar at our Whole Foods)
container of fresh kalamata olives
baby spinach
hummus
romesco sauce
lemon pepper to taste
salt to taste

Toast the bread. With a spoon, scrape out underbelly of mushroom. Slice mushroom and spray with olive oil cooking spray. Sprinkle with lemon pepper and salt. Cook on grill pan until tender and just at the point of giving up its juices. When toast is ready, take one piece and spread a thin layer of romesco sauce. Add layer of spinach, and generously heap with cooked mushroom. Take the other piece of toast and spread with hummus.  Add layer of spinach and two or three tomatoes. Serve olives on the side.

I prefer to savor each piece alone, but feel free to combine the two into one decadent sandwich. This sandwich can be adapted so easily! Add grilled zuchini, eggplant, or roasted red peppers for variety. Artichoke, lemon zest and green beans would also be lovely. The possibilities are endless!


Romesco Sauce is a Spanish spread that is amazing with roasted root vegetables and/or spread on sandwiches or toast.  It keeps in the refrigerator for about a month if covered in a layer of extra virgin olive oil. I have never purchased it pre-made but I would bet you could find it at a specialty market. I have to urge you to give ths recipe a whirl. It isn't nearly as time consuming as it initially seems. It is most impressive to serve as an appetizer with an array of roasted or grilled vegetables and offers variety from the same old dips and spreads.

This recipe is adapted from the book Simple Soirees by Peggy Knickerbocker. There are many varieties of Romesco on the internet, but I have adapted this one to be quick and easy. I had the pleasure of meeting Peggy at a cooking class that my dear friend Sherri took me to for her birthday last year. It was a wonderful evening of cooking together and something I highly recommend you do with your buddies. If you are new to cooking or looking to liven the repertoire in your own kitchen, cooking classes provide ample lessons and loads of fun!


Ingredients for Romesco Sauce. Always get your ingredients out before you begin cooking. Put them away as you use them to help keep a clean and organized kitchen.


Romesco Sauce
adapted from the book Simple Soirees by Peggy Knickerbocker

3 teaspoons chili powder
1 1/2 cups hazelnuts, roasted
6 cloves minced garlic
jar of roasted red peppers, I use between 3 and whole jar, depending on taste and size
3 T of tomato paste, add more if needed
1 1/2 tablespoons sweet paprika
1/2 teaspoon hot paprika
2 1/2 tablespoons sherry vinegar
1 1/2 cups olive oil
salt to taste, start with 1/4 teaspoon and adjust as needed

Take foil lined pan and add nuts. Roast in the oven at 400 degrees until just starting to turn lightly brown and fragrant. Watch closely as they go from done to burned quickly.  Add nuts to food processor along with rest of ingredients except olive oil. Start pulsing. Slowly drizzle the olive oil through the spout. You want a consistency slighty softer than peanut butter. Have a piece of bread on hand for tasting. Adjust salt and oil if needed. This sauce tastes better after a day or so. The flavors blend and soften. However that doesn't mean that we don't dig in right away. This makes a large batch. Save in a pyrex covered with oil. It will harden in the refrigerator but mix the olive oil back in or spread on warm toast to soften again. This is such a versatile recipe to have on hand. Yum! Yum! Yum!

Tuesday, April 13, 2010

Tisea

Oh how I LOVE this dish. Tisea is a Middle Eastern breakfast dish that gives you a warm and satisfied feeling after eating. Breakfast can be tricky for Vegans. Without all those egg and bacon dishes, what is a person to do for weekend comfort food? Well, here is your answer folks. Tisea. It may seem odd to eat garbanzo beans in the morning, but I can assure you, after you eating this dish, you will be tanked up until early afternoon feeling oh so good!

I have to thank my in-laws for introducing my palate to these new foods. I had never had such things growing up. The most exotic thing we had was Mexican food, typically from home.  I'll never forget when my in-laws first came to stay with us. I was not one to try new things, but there was no way that I could hurt their feelings and decline. Before you know it, I was gobbling up this and that and going back for more.

My father-in-law is the Tisea maker of the house. He used to make a lovely version with yogurt and hot butter that we enjoyed for many years. I lamented to my sweet father-in-law on his recent visit how much I would miss enjoying his Tisea when he said,"Oh there is another version!"  I was so excited! The next morning we all enjoyed a beautiful spread of food together and indeed we were truly comforted.

Tisea

1 bag garbanzo beans
2 tsp baking soda
1 bag of pita bread
1 bunch parsley
1-2 cloves of fresh garlic
1/3 olive oil
1-2 T ground cumin

Place beans in a bowl. Add baking soda and water to beans. Stir. Let sit overnight. Next morning, pour beans AND the baking soda water into a pot. Boil until tender (this doesn't take too long). Maybe 20-30 minutes.  Remove from heat but don't drain. You need the cooking water. Toast the pita bread until a bit toasted. Tear into large pieces and put in a large casserole dish. With a slotted spoon, scoop out about half of the beans ( or more if you have a big dish) and place over the pita bread in the casserole dish.  Add one cup to one and a half cups of  beans to blender, add 1/3 cup oil, garlic, salt and 1-2 cups cooking water to blend into a watery mixture. Add the water slowly because you can always add more. If you get too much water, just add some more beans, garlic, salt etc. It shouldn't be thick like hummus but watery. Pour this over the beans and pita. It should have a milky look to it. Then add about 1 cup of parsley leaves (or more) and generously sprinkle with ground cumin. The pita gets nice and soft and the bean are tender and warm. Scoop a generous serving into a bowl. YUM!

Serve with kalamata olives, toasted pita triangles and hummus.

*Note: In the photos, we served it with a homemade olive oil hummus and a homemade romesco sauce. I will be including recipes for both at a future date. And although romesco sauce isn't Middle Eastern, it went beautifully with what we ate.

Do you see how it looks milky? But the beans are still showing through. You don't want to drown the entire thing. I like a little more parsley than shown.


In this picture we have the olive oil hummus, the olives and romesco sauce. My husband is adding the final drizzle of olive oil to the romesco.


The feast assembled. We are only missing the toasted pita to scoop up all that good stuff.

Sunday, April 11, 2010

Grilled Asparagus and Take-out Pizza

Spring is here and that means an abundance of fresh vegetables for your table!

One of our favorites is asparagus. The beautiful, crisp, green stems are just begging to be used in everything from salads to stir fries.

Grilling is a wonderful way to keep those gems crisp while imparting a delicious smoky flavor. Prepping asparagus doesn't take more than a few minutes making it an ideal accompaniment to most any main dish.

Chop off the woody stems and then use a veggie peeler to thin out the remaining base. This ensures an incredibly tender stalk.

After a quick rinse in cold water, gently pat dry and place on a large platter. Drizzle with extra virgin olive oil and sprinkle with Himalyan Pink Sea Salt (any sea salt will do) and a few twists of the pepper mill.

Make sure the grill is hot. Add the asparagus and close the grill for a few minutes. Don't wander off as these can burn quickly. After the asparagus begins to show grill marks, remove from grill to a clean platter. Drizzle with an aged balsamic vinegar and serve.

The nutritional benefits of eating asparagus are numerous. Touted to reduce cholesterol and blood pressure to name a few, it is also full of vitamins. Make sure to grill a few extras for lunch the next day. They are delicious cold and can be enjoyed as is or chopped into a salad.

We all have to take a break from the kitchen from time to time. One of our favorite take-outs is pizza. I think this has been the hardest habit to tweak since becoming vegan.  Eating out can easily fit into a healthy lifestyle if you are willing to make a few changes. I try to keep a list of  local favorite places and the items I know I can eat without worry. This preparation can prevent the defeatest attitude of eating like I used to because I didn't plan. So, back to pizza. Any pizza place is usually willing to customize a mini pizza to your liking and make it without cheese. I have found the mushroom with tons of chopped garlic is my particular favorite. Served with my grilled asparagus, I am completely satisfied and I don't feel like I have thrown my healthly lifestyle out the window.  Our kids aren't vegan but they do tend to order veggie pizza more than pepperoni. By adding the grilled asparagus they are getting those extra nutrients and antioxidents which their little bodies need. Maybe one day they will ask to try my pizza, and I will know that the example I am trying to set has made an impact. 


Don't these look amazing?


They taste just as good as they look. I usually grill two batches of these goodies because even the kids are attacking the plate.


This would make great lunchbox food for the next day. Pack a slice or two and some asparagus for the next day. Include a cloth napkin and a thermos of hot tea and maybe a tangerine or apple. Watch your co-workers or fellow students drool over such a comforting lunch and noticed how energized you feel after taking such good care of yourself. Bon apetit!

Friday, April 9, 2010

Middle Eastern Spinach Triangles

It is amazing how so many of our memories are associated with food. When I think of my Grandmothers, I can't help think about the good cooking we had from both of their kitchens. I see them in the kitchen, cutting, chopping, stirring, tasting, offering, laughing, sweating, and teaching. We don't think these times will end, but all good things eventually do.

That is why it is so important to have the kids in the kitchen with you. It is why I really believe that the kitchen is the heart of the home. When you are in the kitchen with family, you are present, focused on the task at hand, and the conversation flows freely. You are collectively working on a family meal, anticipating its taste and aromas.

If the kitchen isn't the heart of your home, it is time to ask why. Does it need a good scrub? Do you need to re-organize things to rid the space of extraneous clutter? Are you swamped with plastic cups, coffee mugs, teacups and plasticware? If so, make today the day you work towards making this an inviting place for your family to meet and get together. No one wants to cook, eat or share in a dirty kitchen. Put some flowers on table, have the votives (and matches!) handy so that when it is time to cook dinner or set the table you are ready. Clear out a special spot for some teas near where you keep your cups. In our house, we can't get down to business without a hot cup of tea, usually herbal or green.  Have a nice variety available for guests and yourselves for that matter. Do you see how quickly things can evolve to set the stage for magic? You are creating a place of respite from everything else out in the world plus teaching your kids to do so just by example.

This week, we have spent many, many hours in the kitchen. All of them have been meaningful. My in-laws arrived last Saturday and both are spectacular cooks! They live out of the country and each time they come, we ask for the same dishes over and over. It reminds my husband of his childhood, it reminds me of my in-laws and it teaches our children their heritage.  Luckily, where they are from, meat, chicken and fish are not usually the showcase of the dish so they were more than willing to cook without these items. Not once did we miss them in the cooking and more often than not, the recipe itself was already vegan.

One of the most delicious labors of love are the Spinach Triangles my mother-in-law makes.  This is a family affair for sure. When we make them, it isn't a dozen, it is several dozen. That's because you eat half right as they come from the oven! I am going to cut the recipe way, way down especially since most of us will be making them for smaller families and I'm sure you don't have an extended family army waiting to stuff and roll. Plus it is much better to learn something new by cooking it in a small batch. To make a larger batch, just double or triple the ingredients. They freeze beautifully after cooking and so does any leftover spinach filling. They are a perfect appetizer or lunch box accompaniment to tomato soup. Or, you can eat them like my daughter by just grabbing one from the plate each and every time you walk by the kitchen...which is often!

There are many versions of this recipe as they are a staple in most Middle Eastern households.  This recipe is straight from my in-laws and it is how they have made them since really forever. I only deviate to make the recipe smaller but the taste should be close to the same.


Middle Eastern Spinach Triangles
adapted from my mother-in-law

Dough
1 package active dry yeast
3/4 cup warm water
2 plus cups of flour
2 teaspoons salt
1/8 cup of olive oil


Add yeast to warm water and let sit for five minutes. Get large mixing bowl and add flour and salt. Pour warm yeast and oil onto flour and begin to combine. Add more flour as needed to form an elastic dough. If you need guidance on making dough, there are many references on the internet. Cover dough and set in a warm area to rise until doubled.

Spinach Mixture:
1 bag of frozen organic spinach (if boxed kind, you may need two small boxes)
1 medium onion, chopped
1/4 cup olive oil
1 bunch cilantro, cleaned and leaves removed from stems
about 5 garlic cloves, minced (could need more depending on taste)
5-7 fresh lemons, juiced
salt to taste
about 2-3 teaspoons red pepper flakes
about 1 1/2 teaspoons ground allspice
seeds of half a pomegranate (when in season, buy and freeze for when you need-but can be made without)
1 cup walnuts, crushed to a fine texture (put in plastic ziploc and hit with a pan to crush)

Thaw spinach over colander. Squeeze excess water. Set aside. Put oil in dutch oven and heat. Add onion and cook until translucent. Take off heat. Add spices and salt. Chop cilantro leaves and mash in the minced garlic to release flavor of cilantro and garlic. Add to onion. Add squeezed spinach, walnuts, pomegranate seeds if using. Add lemon juice a little bit at a time to desired tartness. Mix it all together adjusting seasonings, lemon and oil. This is a very "to taste" type recipe so it is whatever you like. You also don't need to cook the spinach as it will be baked in the dough.
Once dough has risen, roll out a little bit and add some olive oil. Fold and roll this into the dough. Do this two more times adding flour as needed. Finally roll dough to a thin layer. Use a large biscuit cutter to cut circles. Place a generous scoop of spinach in the middle and pinch up the sides to form a triangle ( picture below). You can also make large ones for lunch and fold over like a calzone. Or, you may make open faced ones (picture below). After folding, place on an oiled, foil covered baking sheet. Make sure to roll the triangle around to cover in the olive oil. Bake at 400 degrees until lightly golden brown.  Hopefully you get the picture that you can personalize these to your liking in both shape and taste. Warning! These are addictive!

Today is a sad day in our house. My in-laws have left and with that our daily cooking sessions. I still get a whiff of their cologne and perfume as I walk by their bedroom. As I bite into a spinach triangle and cradle a hot cup of mint tea, I am reminded of the fun times we have had over the past week, and I smile.
Teta with the grandkids making the dough.


A lesson from the master. My daughter learning how to roll the dough.


Teta still rolling dough. I told you it was a long process when you make so many!

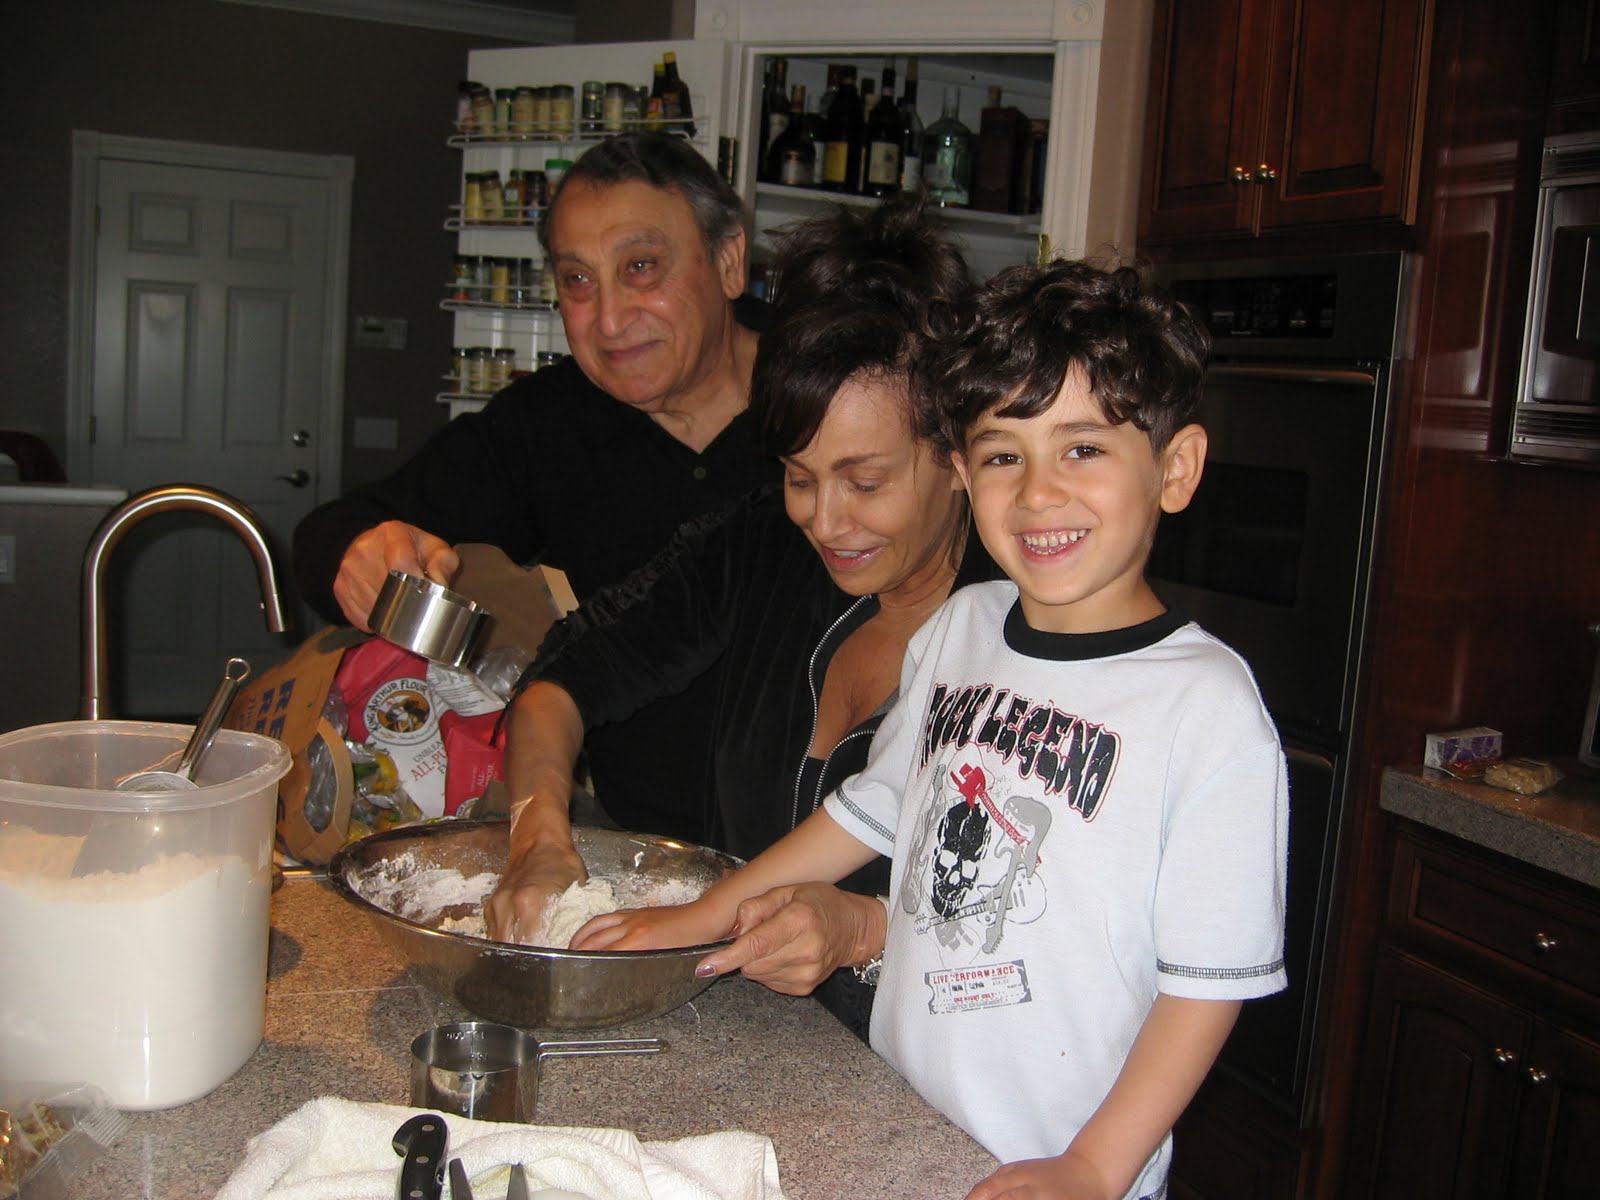
Jiddo, Teta and grandson all making dough in the kitchen.


Other grandson learning to roll dough. He finally took off his hat!

Yummy! Open-faced spinach treats.

Spinach mixture on the stove.

Hot from the oven spinach triangles. Why on such a measly sheet you ask? Both ovens went out! We would not be deterred and ended up baking these in my toaster oven! They still turned out wonderful.

We did find time for a little outside fun. Here is the family at the show "Wicked" in San Francisco.
It was spectacular!

Monday, April 5, 2010

Mexican Red Quinoa Salad

Loaded with flavor, crunch, tang, zip and zest, this Mexican salad is bursting with yummy goodness. Give yourself plenty of time to do the prep for this one.  I can assure you, it is well worth the effort.

My dear sister-in-law, Esther, has been a vegetarian ever since I have known her. She is a great cook and shared a Mediterranean Quinoa Salad that my husband and I ate into the ground (yes, I will be sharing my version of this salad later). It is incredibly tasty and healthy, but I decided to try my hand at a Mexican version, to give our tastebuds a bit of a break from such a tried and true dish.

The Mexican version has evolved several times since I first made it. Each time, we think of a new ingredient to include, and it always turns out just a bit better than the last time we ate it. This is the type of salad that one plate turns to two, then before you know it, you are on your third plate and forcing yourself to walk away from the table.

This recipe makes a huge batch.   It holds in the refrigerator for several days making it ideal lunchbox food.  It can be beautifully presented on a large white platter and makes an impressive buffet addition. You can easily make this salad for four or twenty by increasing all of the ingredients. Listening to the oohs and ahhs around the table will make you feel like a culinary genius!

Mexican Red Quinoa Salad

1 cup red quinoa
2 cups water
1 bunch watercress, rinsed and all the leaves pulled from the stem
2-3 cups cabbage, shredded (buy the pre-shredded bag)
2-3 cups carrots, shredded (buy the pre-shredded bag)
1 bunch cilantro, washed and all the leaves pulled from the stem
1 small bag frozen, organic, sweet white corn
1/2-1 diced red pepper
1/2 diced jicama
1 pint cherry tomatoes, halved
1/2-1 red onion, diced
3-5 green onions, diced, both white and green parts
1 cucumber, diced, leave skin on for extra nutrients, either Traditional or English work fine
1 bunch radishes, sliced and quartered
1 bag cooked, black beluga lentils from Trader Joes OR 1 can drained and rinsed black beans
2-4 limes, lemons or combo, juiced
1/2-3/4 cup olive oil
5 cloves garlic, minced
salt and pepper to taste
avocado slices for garnish
tortilla chips for garnish

Additions per your taste: For those that like a punch, dice a seeded jalapeno pepper or add one teaspoon of cayenne pepper to the dressing.

Cook quinoa in water until done.  Add all the ingredients to a big bowl.  Mix olive oil, lime, cumin and minced garlic. Pour over salad and toss well. Taste and adjust lime juice, olive oil, salt and pepper.  Garnish with slices of avocado and/or high quality tortilla chips.

Note: Where recipe calls for 1/2-1 of some ingredient, feel free to judge based on the size of the produce on hand, how much to use. If I get a huge red bell pepper, 1/2 may be enough.  If it is small, I may use the whole thing.  Accordingly, if I am making the salad for a buffet, I will add two whole red bell peppers and increase the rest of the ingredients as well.  It is a pretty full proof recipe.

For a nice luncheon, make a big pitcher of iced, mint tea with lemon slices and serve with homemade vegan chocolate chip cookies (recipe for these amazing cookies will appear soon.) Bon Apetit!

A note about quinoa as stated on the Pearl Quinoa Alter Eco Fair Trade bag," Alter Eco Quinoa is an ancient grain that has been cultivated in the Andes Mountains of South America for more than 5,000 years.  Locally referred to as the "mother grain" and as a "protein powerhouse," it kept the Incan armies strong and robust."


I am embarassed to say that only three of us sat down to lunch and ate almost the ENTIRE salad in one sitting! YUMMY!

Wednesday, March 31, 2010

Popcorn with Nutritional Yeast

Popcorn, a whole-grain snack, full of dietary fibre, protein, iron, calcium and B vitamins, is a great go-to snack just about any time. And popcorn tastes great. It satisfies that crunchy/salty snack we sometimes crave and it is relatively low in calories.

I am not talking about microwave popcorn either. Who wants that stale, chemical laden treat in their bodies when they can have real, home popped popcorn in the same amount of time? Not me!

One of our favorite family items is our Cuisinart EasyPop Popcorn Maker. We use this popcorn maker almost daily! It is that good. Ours, purchased from Williams-Sonoma, was about $50.00, and so worth the money considering how much we love this tasty treat. Used with an organic popping corn, you just can't make a healthier snack.

To keep this treat healthy, I lightly spray the corn  with cooking spray prior to popping. The top vent allows steam to escape so you end up with a truly crisp kernal. Next, I sprinkle about 2 teaspoons of nutritional yeast, found in the bulk aisle of any health food store, over the popped corn and give it a few sprays of Olive Oil cooking spray. You could also melt a tiny bit of Earth Balance Buttery Spread if you have the calories to burn. Maybe a small dash of salt to complete. The nutritional yeast is what makes this popcorn over-the-top addictive! It imparts a slightly cheesy taste that is irresistable while still adding nutritional benefit. What more could a person ask for in a snack?

This is a staple after school snack for the kids. I make a big batch and divy it up into individual portions. As I pick up carpool, I hand each kid a bag as they get in the car. I also love to bring this into the movies, smuggled into my big purse with bottled water. I have zero guilt or worry while enjoying the healthy version of artery clogging movie theatre popcorn. For a special treat you could add a few vegan chocolate chips, raisins or nuts. There are so many endless possibilites. The key is taking the five minutes to make yourself or those you love a healthy snack and being PREPARED before hunger strikes! I had to put that in bold. Not just for you to read, but for me too. Being prepared with healthy food make it so much easier to resist what is bad. And, it only takes minutes. Bon Apetit!

Tuesday, March 30, 2010

Stess and Relaxation

I used to be chronically stressed. It is still something I have to work hard to manage. The day to day responsibility of taking care of three kids plus a husband along with all the other things that pop up can be overwhelming to say the least.

In an effort to learn to control stress, I stumbled upon a wonderful book that taught me so very much! The Relaxation and Stress Reduction Workbook by Martha Davis, Ph.D., Elizabeth Robbins Eshelman, MSW, and Matthew McKay, Ph.D. is filled with technique after technique to teach you how to RELAX and control the day to day stress of life.

The most life changing technique I learned is how to breathe correctly.  Most of us do very shallow breathing, but diaphramatic breathing is a whole different ball of wax. After the very first breathing practice I felt better and more relaxed than I had in ages. I practice this type of breathing twice a day. After I exercise and at night before I go to bed.

In addition to working on my breath, I listen to the same meditation music, Buddha Moon, by Chenmaya Dunster, so that once my body even hears that first beat of music, it knows that it is time to relax. At night, I usually get to about the two minute mark before I am deeply, fast asleep. I finally understand what it means to meditate! It is the most amazing, wonderful, quiet time that allows you to reconnect with yourself and let the stress go out of your body. If I happen to wake up in the middle of the night, I pop that music back on, very, very low, and focus on my breathing. Anytime my mind wanders, I go back to counting my breath and then I am fast asleep.

The benefits of working on your breath after exercise is it is like taking a long nap. When you open your eyes, you are refreshed, calm and ready to head back into the chaos of the day. The music has four, fifteen minute songs so it is easy to know when it is time to come back to reality. If I have time, I try to lay on the yoga mat for a full thirty minutes, but fifteen is the minimum. I consider this meditatve time to be just as important as the exercise!

The neat thing about this book  is that each chapter or technique builds upon the last. You go from breathing, to progressive relaxation, to meditation, visualization, applied relaxation, self-hypnosis and the list goes on and on. There is something for everyone and every level. This book is certainly one of my favorite things!

What do you all do to relax?